
A long time ago when I was a kid at college attending UCLA, my main squeeze and I used to visit Laguna Beach in the Summertime and chiefly during their Festival of the Arts. Now Laguna Beach was then -- as now -- a pretentious, overstuffed haven for artists attempting to wring out yet one more mural of the Orange County coastline that the city sits on and also wring out yet one more dollar from the tourists who ventured down there for their shops, restaurants, and other venues that purveyed the treacly, maudlin, kitsch, and largely unfresh goods and paintings that delight old blue hairs and who drag their paunch, bald-headed, Bermuda-short clad hubbies for an afternoon or weekend of "terminal quaint". The same held true for their annual Summer "Festival of the Arts" where those tiresome moonlit seascapes with the translucent wacves crashing on the sand beaches or YET ANOTHER view of the Laguna Hotel form the Gazebo. (You had to have been there.) In any event, this soiree transpired back up Laguna Canyon aways at a location that charged a stiff tarriff to enter. As it was with the times those days, the 60s were in full tilt boogie, having just passed the Summer of Love and hippies and dead heads were springing up all over.
Laguna was not to be denied.
Seems that a collection of artists set up camp in a vacant lot -- with the permission of the owner, a la Max Yasgur of Woodstock fame -- and began a FREE showing and selling of their fresh, new, and interesting crafts. It drew throngs of folks who both rebelled at the stuffy art show across the street and reveled in the novelties on offer. The beauty of these pieces were in the observer remarking, "How marvelous; why didn't I think of that?" The point was, that the stuff was interesting, enchanting, and bore the true craftsmanship of someone who had an elegantly simple but interesting idea and the skill to bring it to life.
Sadly, The Sawdust Festival is now become a over-imitated parody of itself, charges admission, and is fraught with crass commercial goods. But the memory of the fun lingers.
So it is with this fresh, new offering (among several), from a gentleman in Columbia, South Carolina -- Bill, W4FSV -- laboring under the mantle of the truly unique and interesting title of Breadboard Radios whose products are among the neatest I have seen for weeknight or weekend projects. Among his products is one Sawdust Regen Receiver and it has to be one of the more interesting kits I have seen/built in a long time. Here is his original picture from his website:

..with usual caveats regarding his copyright privileges and how I will pull it is Bill objects to its use, etc. Bill's products evince a wood/woodworking theme -- the Splinter II QRP Receiver/Transmitter, The Toothpick Audio Filter, The Matchstick Tuner, and my personal favorite (aside from the Sawdust Regen), the Woodstain "Cantenna-like" Dummy Load:

Anyway, I have been on a building jag for the last two months (and it is likely to continue) with most of it centered around breathing life into various incarnations of the venerable Regenerative Receiver, a design that predates the superheterodyne but is simple and very sensitive. However, thrashing about in a number of QST articles -- the N6BYT WBR regen and the Kitchin Scout Regen -- and producing largely unsatisfactory results, I was frustrated to actually breathe line into a regen, kit or otherwise. The two circuits mentioned were built on PCBs by Far Radio Sales, whose quality was good and could have worked were it not for the monumental editing errors in the QST articles and the lack of intuitive electronic ability of yours truly.
To be fair to N6BYT and the WBR, the QST article was so fraught with contradictions -- even in the follow-up stays -- that it was extremely hard to bring off. I will be attempting to mimic the excellent work done by Dave Richards, AA7EE, whose WBR is a true work of art. But he did his with QRPMe squares and Manhattan construction and added an interim 2N3904 amplifier stage before the LM386 audio amp. The QST article only had a pathetic implementation of the LM386 that only produced whispers barely heard on ear phones.
Very unsatisfying.
So that was when I stumbled across the The Sawdust Regen as shown in this video on you tube:
..and the hook was wet, so I sent Bill $25 for the unit (includes shipping, I believe) and, less than a week later (even during the heavy Christmas season mailing log jam), I received my kit. I took an evening and put this together -- working carefully -- and was absolutely delighted with the result once I worked a couple of self-imposed kinks out; see comments below after the pictures.
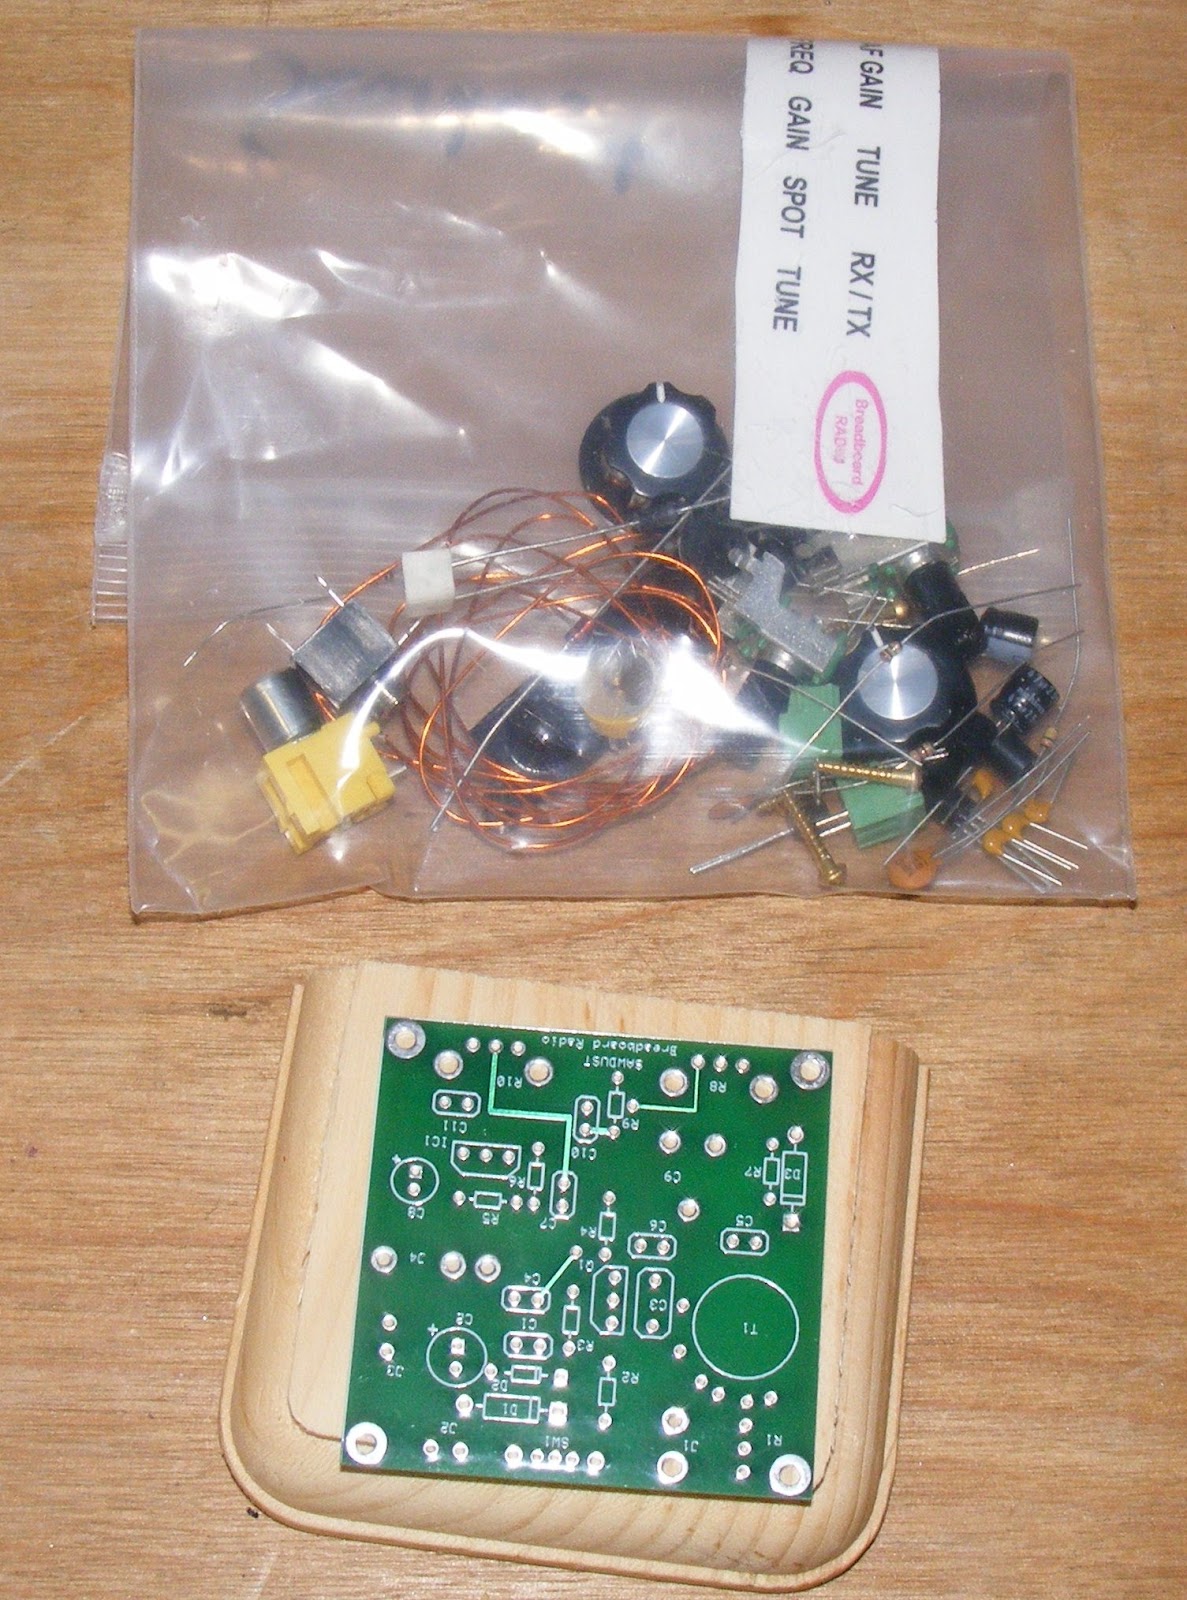 |
| Kit as received with PCB, base, and bag o' parts. (Knobs included!) |
 |
| Radio base in keeping with Bill's woodworking theme |
 |
| Not an alien but the main coil. It is imperative that winding instructions are followed! |
 |
| The main coil -- in situ |
 |
| The alien reaching out for a victim? |
 |
| Finished underside of board. |
 |
| Finished top side of board. Note screw connectors. |
 |
| Finished kit - top left view. |
 |
| Finished kit - top right view. |
 |
| Finished kit - top straight on view. |
 |
| Finished kit - well, you get the idea. |
Be absolutely certain that you follow the coil-winding instructions to the letter! I did not at first but, before putting the coil on the board, I double checked my work (and the instructions) and discovered that it is important to wind the turns on the coil (there are three separate windings) in a certain direction or the radio will not work.
Also, those 1/8th watt resistors are mighty small and it is hard to read the color stripes -- SO BE SURE the resistor you are mounting is correct. I confused the 47K resistor for the 470K (or something) and I heard nothing when I put the coal to the radio. Extracting and swapping the resistors destroyed them so I dove into my junk box for replacements. (I only had 1/4th watt resistors but they could be mounted vertically on the board just fine.)
Oh, and these cosmetic issues: your friend, the genius, did not read the instructions and tried to peel the labels off their backing with no success. Then I found out that they were decals (just like the models you built as a kid) but it was too late. So, I cut the the remaining decal labels (I still did not have a clue) and glued them to the base after I finished it with some Danish oil I had on hand. I let it dry in the sum for about two hours and coated it with some Krylon clear coat and it turned out just fine.
When all was ironed out, I tested the radio and found that, once aligned and set, it could cover approximately 6,900 kHz through 7,120 kHz -- more than adequate for coverage of the 40 meter CW band. I will probably re-tune it to listen to the upper part of the band -- SSB or AM -- or even higher to hear the AM broadcast stations around 7,300-7,420 kHz.
But it is a great radio and fun to build. It cannot work miracles -- especially in my crappy location -- but when 40 meters is in (most nights), it's very sensitive using a short wire antenna and has a crisp, clear sound with plenty of audio to drive a set of headphones. And, believe me, this little project is one hell of a lot better than running down the errors and foibles of those hoary old QST articles.
Give it a try! Guarantee you will have a building and using it.
-72-
No comments:
Post a Comment